The Rengard Headlight Restoration Kit is a DIY solution designed to tackle yellowed or hazy car headlights, improving visibility and giving your vehicle a cleaner look. This kit offers a cost-effective way to achieve professional-looking results without a trip to the auto shop.
Why Restore Your Headlights & What is Rengard?
Over time, exposure to UV rays, oxidation, and road debris can cause your car's headlight lenses to become cloudy, yellow, or hazy. This not only makes your car look older but, more importantly, significantly reduces nighttime visibility, compromising driving safety. While DIY methods like using toothpaste or basic sanding have been attempted, they often provide only temporary fixes or can even damage the lenses further. The Rengard Headlight Restoration Kit offers an effective and accessible solution to these issues, enhancing both your car's safety and aesthetics. In my experience, it significantly improved the clarity of headlights on a 4-year-old vehicle, making them look much newer.
Why Choose the Rengard Headlight Restoration Kit?
My decision to choose Rengard was primarily driven by its convenient online availability and the overwhelmingly positive user reviews. Many DIY car care enthusiasts have reported high satisfaction with this product, which influenced my purchase. The kit conveniently includes all necessary components for the restoration process, eliminating the need to buy supplies separately. This is a significant advantage over taking your car to a professional detailer, where labor costs can be substantial. Compared to the expense of replacing the entire headlight assembly, a DIY restoration kit like Rengard offers considerable savings. While it requires your time and effort, the reward of maintaining a clean and safe-looking vehicle is well worth the investment for those who value their car's appearance and performance.
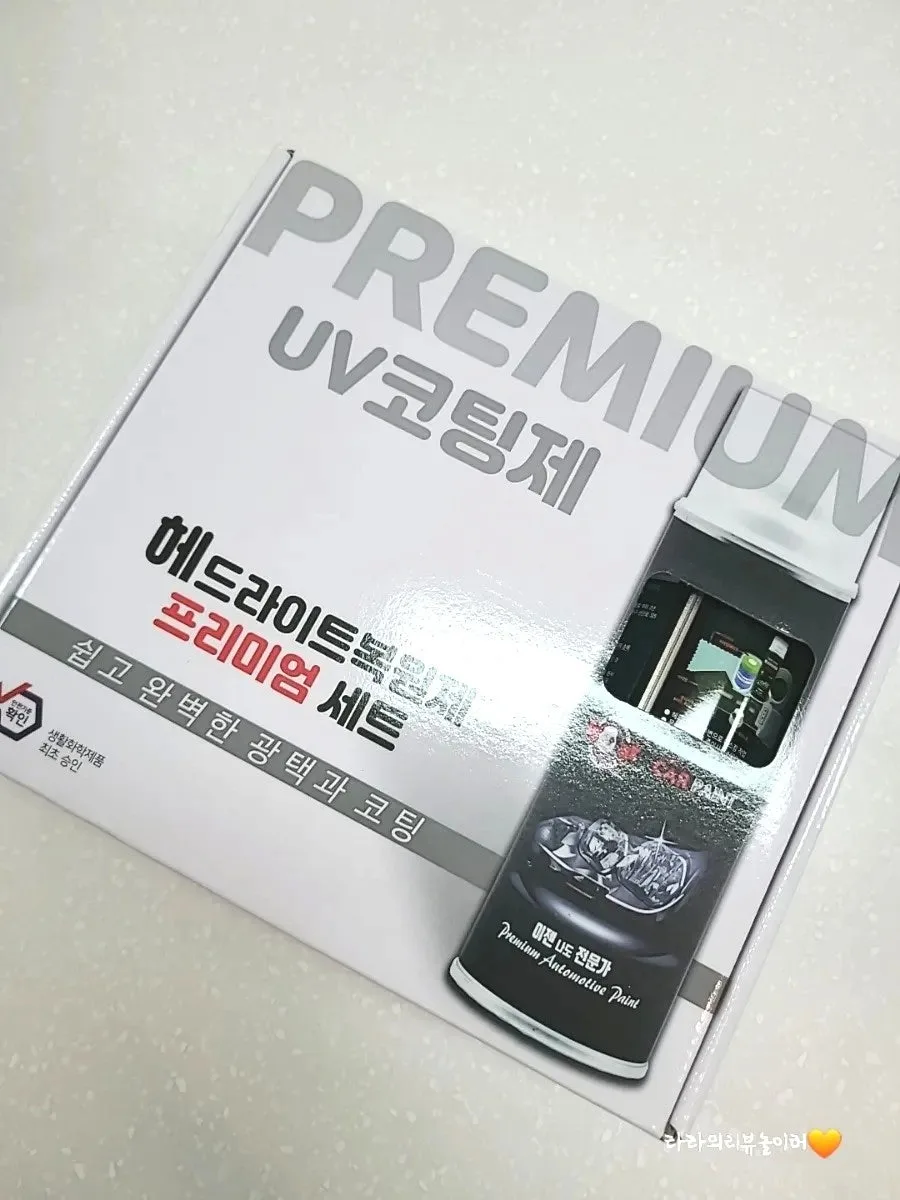
Rengard Headlight Restoration Kit: Components & How-To
The Rengard kit arrives neatly packaged and contains everything needed for the job. Inside, you'll find masking tape, covering tape, 400/600/1000 grit sandpaper, a degreaser spray with a towel, a primer (Adebang), and the UV coating agent. This product is reportedly used by professional auto body shops, making it a reliable choice for DIYers aiming for professional-grade results. The coating agent is a certified household chemical product, ensuring its safety for consumer use. To use the kit, first, carefully mask the area around the headlights to protect the paint. Then, wet-sand the lenses using the provided sandpaper, starting with the coarsest grit and moving to the finest. After sanding, thoroughly clean the surface with the degreaser to remove any oils or dust, which is crucial for optimal coating adhesion. Finally, apply the UV coating agent in 2-3 thin, even layers, allowing for proper drying time between each application.
Rengard Headlight Restoration: Real-World Results
My car, about four years old, had noticeable haziness and some discoloration on its headlights. I began by meticulously applying the masking and covering tapes around the headlight units.
Following the instructions, I wet-sanded the lenses, progressing from the 400-grit to the 600-grit, and finally the 1000-grit sandpaper. The key is to sand gently while keeping the surface wet to effectively remove the oxidation without causing new scratches. After sanding, I used the degreaser towel to wipe down the headlight surface, ensuring all residue was removed before allowing it to air dry completely. This step is vital for ensuring the coating bonds properly.
Once dry, I applied the UV coating agent. I applied the first coat, waited 30 seconds, then applied a second coat, waited 60 seconds, and finished with a third, slightly thicker coat. The transformation was remarkable. The cloudy, yellowed appearance was gone, replaced by crystal-clear lenses. The difference in nighttime driving was immediate; the light beam was brighter and more focused. This DIY project delivered impressive results at a fraction of the cost of professional repair.
English crawl path
Next English reads from this pilot cluster
Continue through the category hub, latest English stories, and related posts so this translated article is not an isolated URL.
Tags
💬Frequently Asked Questions
What should I check first in Restore Your Car Headlights: DIY Guide 2026?
Does this Automotive article link back to the Korean source?
Where can I find similar English stories?
English discovery path
Explore more English K-culture stories
Keep browsing the indexed English pilot cluster so Google and readers can move between this story, the category hub, and fresh discovery pages.
Original Source
Read the Korean original