The best way to store your robot vacuum and its charging dock is by cleverly converting the unused kickboard space beneath your kitchen sink. This DIY solution hides the charging station, eliminates unsightly cords, and maintains your kitchen's aesthetic, allowing for automatic charging and seamless return to base.
Why is Converting Sink Kickboard Space Ideal for Robot Vacuum Storage?
One of the biggest post-purchase dilemmas for robot vacuum owners is finding an aesthetically pleasing and practical spot for the charging station. Placing it in the living room can disrupt your decor, while a bedroom location might be inconvenient for cleaning routes. This is why many homeowners search for 'hidden robot vacuum storage' or 'sink modification for robot vacuum.' Utilizing the often-neglected dead space beneath kitchen cabinets, specifically the kickboard area, has emerged as a highly effective solution. Many modern apartments and homes are incorporating this design, creating dedicated, discreet spaces for robot vacuums that don't detract from the kitchen's overall look and even enhance cleaning efficiency. This approach allows you to conceal both the vacuum and its dock, contributing to a cleaner, more streamlined kitchen appearance.
How to Install a Robot Vacuum Storage Unit in Your Sink Kickboard
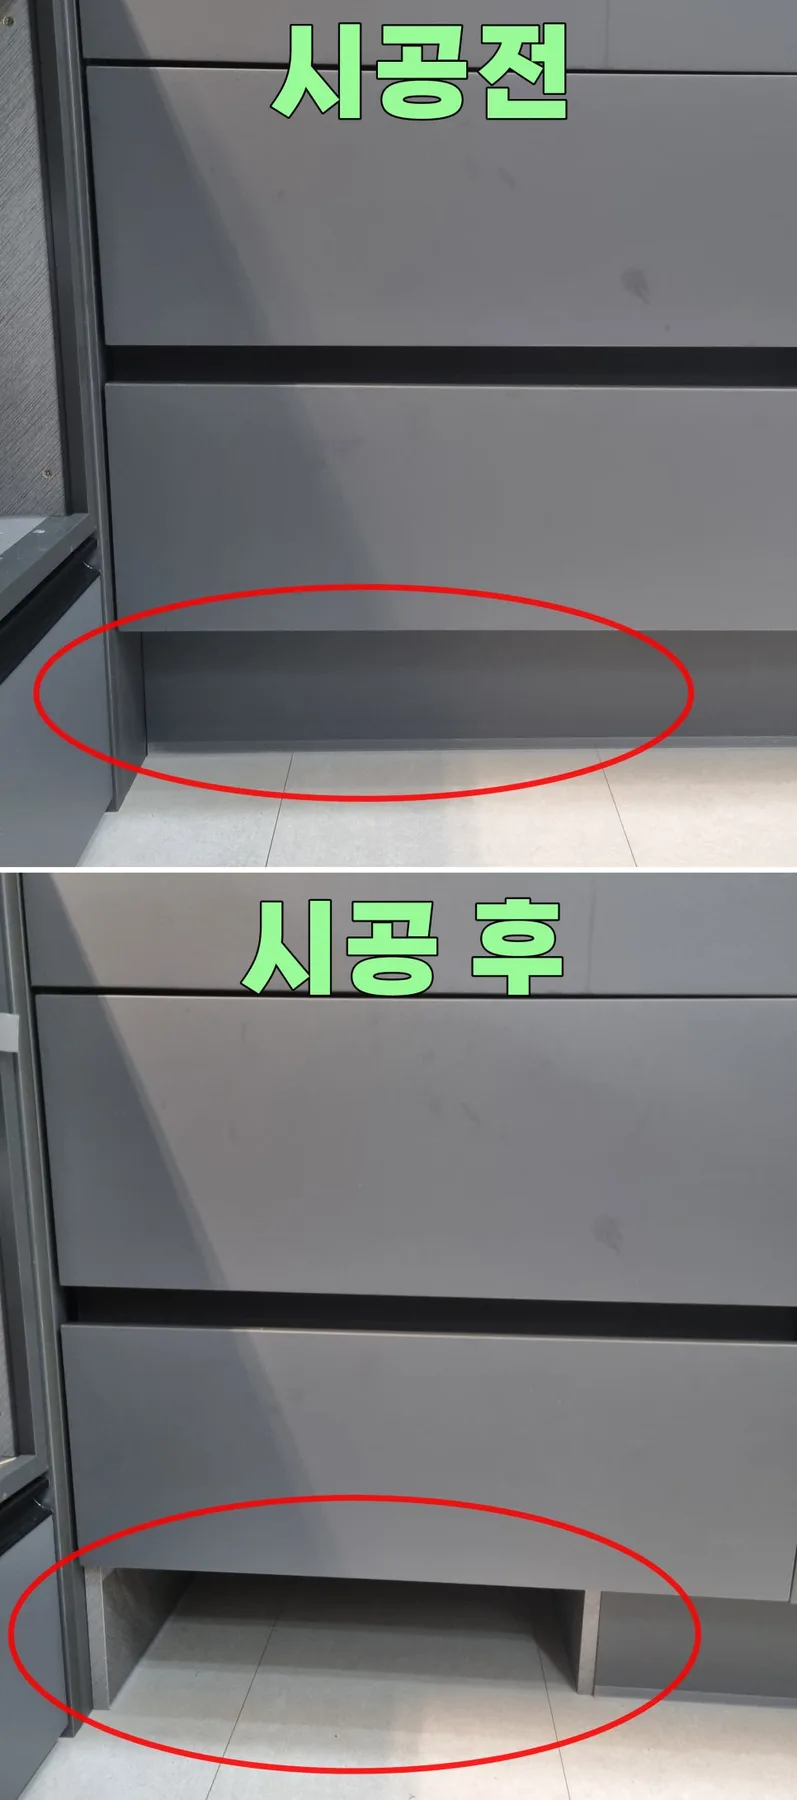
Creating a robot vacuum storage compartment by modifying your sink's kickboard involves several precise steps. Initially, a professional will visit your home to take detailed measurements, assessing the robot vacuum's dimensions, the ideal charging station placement, and the feasibility of electrical connections. Accurately determining the necessary height and width for the vacuum to move freely is crucial during this phase. Next, the kickboard section of the cabinet is meticulously cut to accommodate the vacuum's passage. Precision is key here; a cut that's too small will prevent the vacuum from returning to its dock, while one that's too large can lead to a messy finish or allow debris to enter the space.
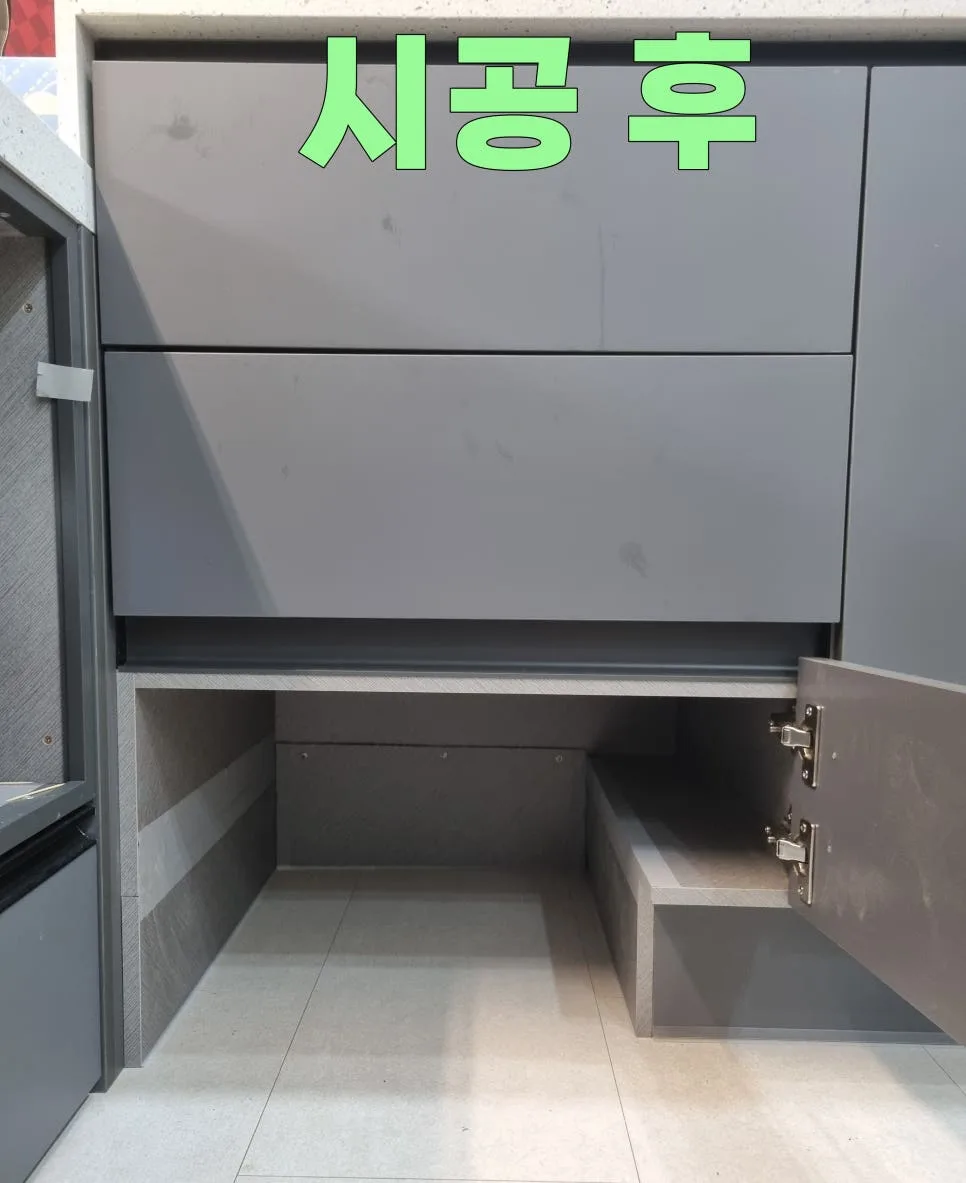
The interior space is then finished to ensure a stable docking surface for the robot vacuum. Electrical wiring is managed internally, with an outlet installed to allow for automatic charging without external cords. Finally, a custom-fit cabinet door, designed to match your existing kitchen cabinetry, is installed for a seamless look. Post-installation, a thorough test is conducted to confirm the vacuum's entry, automatic return, and charging functions operate correctly.
What Are the Pros and Cons of Robot Vacuum Storage Unit Installation?
Utilizing the sink kickboard space for robot vacuum storage offers significant advantages. The primary benefit is its ability to discreetly hide the vacuum and its charging base, preserving your kitchen's aesthetic appeal. It also eliminates the hazard and visual clutter of exposed cords. By installing an internal outlet, you enable automatic charging and return-to-base functionality, creating a convenient, built-in storage solution akin to custom cabinetry.
However, there are considerations. This modification isn't suitable for all sink configurations, and the feasibility and cost can vary based on the available space and existing cabinet structure. Professional expertise and precise work are essential, making the selection of an experienced installer critical. Improper installation could impede the vacuum's operation or cause further issues. Therefore, consulting with a professional beforehand to understand the possibilities, costs, and expected outcomes is highly recommended.
What Precautions Should Be Taken During Robot Vacuum Storage Unit Installation?
When installing a robot vacuum storage unit in your sink's kickboard, several precautions are vital. Firstly, accurately measure the dimensions of your specific robot vacuum model and its charging station. This information is essential for determining the correct size of the kickboard opening, ensuring the vacuum can move in and out smoothly and dock correctly. Secondly, do not underestimate the importance of the interior finishing. The floor of the compartment should be flat and clean to allow for stable docking, and a poorly finished interior could potentially damage the vacuum. Thirdly, adhere strictly to safety regulations for electrical wiring and outlet installation. Given the kitchen's potentially humid environment, consider using waterproof outlets and ensuring all wiring is safely concealed and protected.
Lastly, after installation, rigorously test the robot vacuum's ability to enter, automatically return to the dock, and charge successfully. Also, check that the new door opens and closes smoothly and blends well with the surrounding cabinetry. Following these guidelines will help ensure a satisfactory and functional robot vacuum storage solution.
English crawl path
Next English reads from this pilot cluster
Continue through the category hub, latest English stories, and related posts so this translated article is not an isolated URL.
Tags
💬Frequently Asked Questions
What should I check first in Hide Your Robot Vacuum: DIY Sink Kickboard Storage 2026?
Does this Home & Interior article link back to the Korean source?
Where can I find similar English stories?
English discovery path
Explore more English K-culture stories
Keep browsing the indexed English pilot cluster so Google and readers can move between this story, the category hub, and fresh discovery pages.
Original Source
Read the Korean original